 Finally, after 2 months of storing the windows in my garage to wait out the weather delays, we installed the windows. With the triple glazing, fiberglass frames, the south wall windows were very heavy…357lbs, requiring 4 guys to lift them.
We speced a brickmould (exterior trim) that doesn’t have a nailing flange which also complicated the installation. We chose this because the depth of the brickmould (4 1/2″) helped move the window into the wall toward the interior. This has two benefits. It improves the performance of the window by reducing the thermal bridging at the edges and it looks better from the interior by reducing the depth of the jamb return from almost 15″ to 9″. 
We installed the windows before the I-joists and final layer of sheathing so that we can run an early blower door test to identify any problem areas in the air tightness and rectify while the air barrier is still uncovered. We keep our fingers cross for this test on Monday.
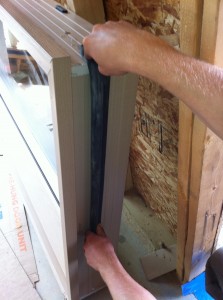
I ordered a rubber gasket to seal the gap between the window frame and jamb from Conservation Technology in the US. These flexible, durable gaskets are designed to create a better seal then spray foam. We will use both to double up the sealing. The gaskets are very expensive with shipping and customs fees but are suppose to be an easy way to get a quality seal around the windows. It will still be a challenge to seal around the shims on the bottom of the windows.
I also ordered a “P” gasket that we will staple to the bottom of the door stills to improve air tightness from the typical building practice of using caulking or acoustical sealant.
The gaskets on the doors very well. Unfortunately, the gaskets did not work at all with the window. With the drywall return, jamb brackets and the brickmold we couldn’t get the gasket inserted against a flat surface to form a continuous seal. We changed to using blue skin on the exterior with spray foam in the cavity.
I can see where the gaskets would work very well when sealing with a nailing flange and we will try them on our next project.


Leave a comment